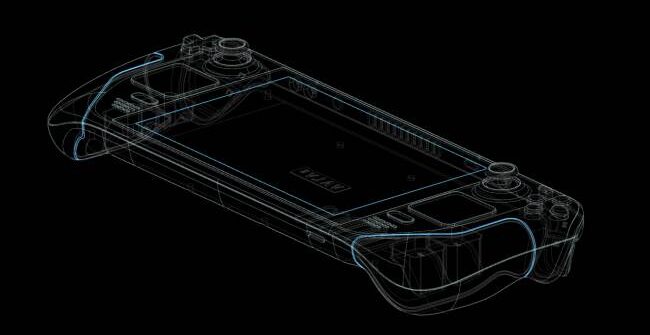
STEAM DECK NEWS – Steam Deck even lets you run games developed for Sony’s consoles two years earlier.
Installing EmuDeck is recommended. You’ll also need a few other things. A high-speed A2 microSD card is required to install the emulator and PS3 games. Connect the Steam Deck to a power outlet or use a Steam Deck dock. You need to make sure the Steam Deck has enough battery life for the installation. The Steam Deck dock also allows you to connect an external hard drive or SSD as an alternative to using a microSD card. A Bluetooth keyboard and mouse simplify setup, navigation and file transfer. Legally owned PS3 ROMs are also required…
Time to activate Developer Mode. Press the Steam button below the left trackpad. Open the System menu from the side menu. Under System Settings, select Enable Developer Mode. The new Developer Menu is located at the bottom of the Side Access Menu. In the Developer menu, locate Miscellaneous. Turn on CEF Remote Debugging. Press the Steam button. Open the Power menu and select Reboot.
Now let’s install EmuDeck. Turn on the Steam Deck. Press the Steam button below the left trackpad. Highlight System. Then toggle Enable Developer Mode. Highlight the Developer menu on the left panel. Toggle Enable Unified Frame Limit Management. Press Steam again and select Power. Switch to desktop mode. Open your preferred browser. Download the latest PS3 software from the official PlayStation website and download the Windows version. Save the PS3UPDAT file to a convenient folder on the Steam Deck. Navigate to the EmuDeck website, select Download, select the Steam OS version, and select Custom Install. In the EmuDeck menu, select the SD card image named Primary. You can now choose your emulators. Select all of them or the PS3 emulator named RPCS3. Also make sure you select the Steam ROM Manager. Continue and select Finish to complete the installation.
Time to transfer the games. Open the Dolphin File Manager. Open the Primary folder under Removable Devices. Open the Emulation folder. Click ROMS and find the folder called PS3 transfer your PS3 ROMS to this folder. Add the PS3 update file. Click the Steam icon in the bottom left corner and open All Programs, find the program called RPCS3 and open it. In RPCS3, click File, Install Firmware, and open your saved PS3UPDAT PUP file. Wait a few moments and the PS3 software update file will be synchronized with the emulator. To set up the controller, open Configuration. Open Pads and then Player 1. Under Handlers, change the Keyboard to SDL. Make sure Steam Virtual Gamepad 1 is selected under Devices. Then select Save. Now add the PS3 games to the Steam Deck library. Check the RPCS3 compatibility list first before taking the time to add ROMS to the Steam Deck. Reopen the EmuDeck application in All Programs. Under Featured, select Steam Rom Manager. Click Yes to exit Steam. Select Next on the Welcome to SRM! screen. Uncheck Toggle Parsers. Select the two PS3 tabs named RPCS3 Extracted ISO and RPCS3 Installed PKG. Click Add Games and then Parse on the next screen. If all the images are correct, click Save to Steam.
To fix missing artwork in EmuDeck, click Fix in the Cover window. Click the drop-down arrow next to Per-App Exceptions to expand the search bar. Type the title of the game in the Game Title search bar. Click the desired artwork so that it turns white. Then click Save and Close. You can also upload it. Click Upload. Locate your cover art in the File Manager. Wait for the image to upload, then click Save and Close. Click Save to Steam to add the games and cover art to your Steam library.
You are now ready to play the games. Return the Steam Deck to Gaming Mode. Press the Steam button. Highlight and open the Library menu. Press the R1 button to open the Collections tab. Open the PlayStation 3 window. Select one of the PS3 games you transferred and click Play. Most PS3 games will display a “Compiling Shaders” notification. This is normal for PS3 games to run and will eventually go away. If the games are running slowly, press the QAM button under the right trackpad. Open the Performance menu. Turn on Use per game profile. Try changing the Frame Limit to 40 FPS. If that doesn’t work, try increasing it to 60 FPS. You can connect a wireless or wired keyboard and mouse to the Steam Deck. Alternatively, you can use the Steam Deck’s on-screen keyboard by holding down the Steam and X keys simultaneously and using the trackpads.
Alternatively, you can install Decky Loader and Power Tools. With the Steam Deck in game mode, press the Steam button and open the power menu. Switch to desktop mode. Open a browser and navigate to the Decky Loader GitHub page. Click the large download icon to start the download. After the download is complete, double-click the launcher and select the Recommended Install option. When the installation is complete, restart the Steam Deck in Gaming Mode. Make sure the Steam Deck is in Gaming Mode. Press the quick access menu button under the right trackpad. Access the Decky Loader plugin icon located at the bottom of the QAM. Select the Store icon next to the Settings wheel to open the Decky Store. Scroll down the available plugins to type “Power Tools” in the search bar and install it.
For the Power Tools settings, press the Steam button to open the library, locate one of your PS3 games and launch it from the non-Steam library or the PlayStation 3 tab under Collections. Once your PS3 game is started, press the QAM button to open the Decky Loader and select the Power Tools menu. Turn off SMTs. Move the slider and set Threads to 4. Press the QAM button to open the Performance menu. In the Performance menu, enable Advance View. Then enable Manual GPU Clock Control. Increase the GPU Clock Frequency to 1200. Finally, save these settings for specific PS3 games by enabling Per Game Profile.
You may need to restore the Decky Loader after updating the Steam Deck. Make sure the Steam Deck is in desktop mode by pressing the Steam button and opening the power menu. In desktop mode, open a browser, navigate to the Decky Loader GitHub page, and click Download. Select the Run option and enter your sudo password when prompted. If you do not have a sudo password, follow the on-screen instructions to create one. Choose a memorable password and make a note of it in case you want to install unofficial third-party applications in the future. Wait for the installation to complete and restart the Steam Deck in Gaming Mode. Press the QAM button and your Decky Loader application, settings and plugins will be restored to the state before the update. If your Decky Loader application is removed due to a future update, use these steps again to restore the application.
That’s it…
Source: GameRant


![[TGA 2025] Star Wars: Galactic Racer Focuses on High-Stakes Podrace Runs [VIDEO]](https://thegeek.games/wp-content/uploads/2025/12/theGeek-Star-Wars-Galactic-Racer-302x180.jpg)


